


 Forums Forums
StrategyFirst.com

|
 |
O.R.B. Environment Tutorial |
|
|
Adding Planets to Your Map
We will now add a planet and a moon to this map. Let�s begin with the planet.
Go to Environment > Mallus Planet. Mallus planet is just a descriptive name; it could just be called �Planet 1�. You can make this planet whatever you want.
You should now see a big Dialog box like the one below.
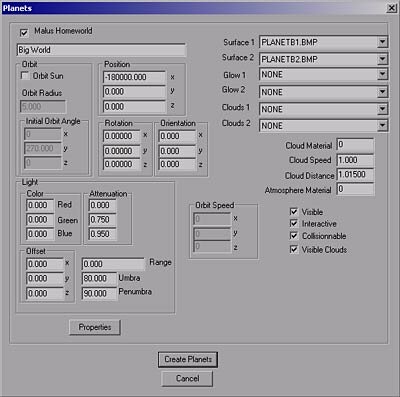
Click on the check box beside Malus Homeworld and enter the name of your planet below, where I wrote �Big World.� This will be the name you see when you move your cursor over the planet.
Leave the Orbit Sun check box unchecked; we don�t want the planet to be flying inside the playable area and then back out; as it could cause some problems when playing.
Enter -1800000 in the X value for position. This will position your planet to the left of your playable area.
The Rotation and Orientation fields are for the planet itself, you can give the planet a tilted look, and a rotation value so that it could spin along one of its axes.
Light can give your planet emissive qualities to emulate light bouncing off the planet or even crazier stuff like comets or burning planets.
Orbit speed is self explanatory; you set the speed and direction of your planets orbit through this field.
The six pull down fields at the top right of this dialog are the texture layers you can add to your planet. Three layers with two sides each. Where you see Surface 1, click the arrow head on the right, and choose PLANETB1.BMP, in Surface 2 do the same but choose PLANETB2.BMP. This will give your planet an earth-like look. The other options are for adding a variety of effects like invisible planets, atmosphere color, cloud color, cloud speed and more. When used in certain situation can result in some fancy visual tricks. For now leave them at their default values.
Once you have entered the surface textures, planet position and name, click on Create Planets.
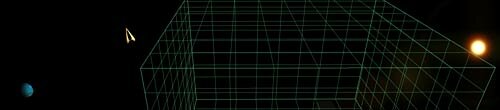
Hmmm... that planet looks rather small, we should make it bigger! Just go back to the Mallus Planet Dialog and click on Properties.
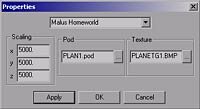 |
Our planet is scaled to 5000 right now. That�s rather small. Let crank that up to 55000. Click on each of the scaling fields and change the number to 55000, this will give us a good size spherical planet.
You could give the planet different scaling values for X, Y or Z; this would result in a deformed sphere.
|
Once you are done changing the scale, just click on the OK button and then on Create Planets.
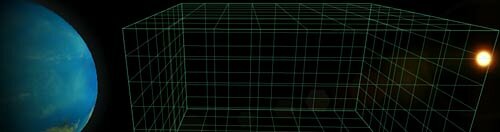
Ahhh... this is better!
Now, if you ever need to delete a planet for some reason, just uncheck the check box in the top left corner of the Planet creation window, in our case Malus Homeworld. Then press Create Planet. This will delete the planet created.
Now we have a planet, let�s add a moon!
|
|
|
|
|
Copyright © 2002 Strategy First Inc. All Rights Reserved.
|
