


 Forums Forums
StrategyFirst.com

|
 |
O.R.B. Environment Tutorial |
|
|
Adding Moons to Your Map
Moons are a bit tougher to adjust since they are always offsets from the Planet�s origin, and adjusting their distance and position is done through angles and radius. Another thing we will need to add is a new texture; right now our map has a �texture pool� with only a few planets and cloud textures - those you saw when you were adding a surface texture to your planet.
In order to get yourself a moon texture you will first need to tell ORB to load a texture into your map�s �pool� so that you can use it. To do this you need to go to: Environment > Additional Textures.
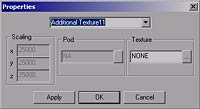 |
In the top drop down list, where you should see �SUN�, scroll down through the list until you find �Additional Texture11�, this is a �free slot� where you can add a new texture. In the field under Texture, write �lune1left.bmp� without the quotes.
Press OK when you�re done. Then go back one more time to the Additional Textures dialog and go to �Additional Texture12�, write �lune1right.bmp� in the texture field.
|
Press OK again. Now you have your textures for both sides of your moon.
If you wish to get other textures, you can load up other maps and look at the textures used by their planets and moons, then just go through the above steps to add them to your map. Please refer to the other sections of the Scenario Editor Tutorials for a complete list of textures and how to add your own textures.
Alright, now let�s build a moon! Again through the top menu; go to Environment > Malus Moons.
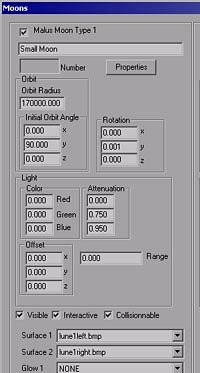 |
You can have up to three moons per Planet, check Malus Moon Type 1. Add a name of your choice where I wrote �Small Moon� just under the Malus Moon Type 1 check box.
In the Orbit Radius field enter 170000; this sets the distance at which the moon is from the planet.
In Initial Orbit Angle, enter 90 in the Y field. If you look at this from the Map view, you will see that 90 degrees falls directly to the right of the planet, 270 will put the moon to the left of the planet.
You can also add a rotational value to your moon to make it spin on itself if you wish. Put a number around 0.001 to avoid making the rotation too fast.
Leave the Light settings as they are for now.
Make sure both Interactive and Collisionnable boxes are checked, otherwise your ship will fly through your moon and you won�t be able to see it on the map.
|
In both Surface 1 and Surface 2, if you open their drop down list, you should find both �lune1left.bmp� and �lune1right.bmp�; those are the textures you have just added. Give Surface 1 �lune1left.bmp� and �lune1right.bmp� to Surface 2.
In the top right corner of the Moon Dialog there is an option called Orbit Speed, this will give an orbiting speed to all of your moons. Right now, leave this at 0, since we don�t want this moon to go out of the playable area.
Before building this moon, click on properties and change its scaling to 7000 in all fields. Click OK then click Create Moons.
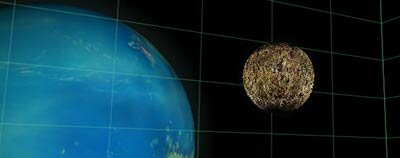
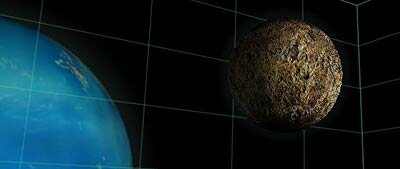
A Moon similar to this one should appear. However, the lighting seems to be off a bit; there isn�t any shading on one side... To fix this, we need to go into the Material Dialog so that we can adjust the moon�s lighting. In the Top menu bar, go to Environment > Material.
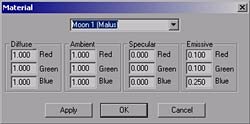 |
In the drop down list at the top on this window scroll to: Moon 1 (Malus).
In the Ambient setting, you will notice that all the values are at 1.000; this is why our moon doesn�t have any shady parts. It sets the minimum lighting to 1. Change the values in all Ambient fields to 0.100. Click Apply.
|
Now the shaded part of the moon should have a bit of a blue tint to it, this is due to the Emissive value of Blue, right now it�s 0.250. Change the Emissive Blue value to 0.1. This will give an untinted look to the shaded area. Click OK.
Now that looks better!
Ok, you�ve got your planet and your moon, what next? How about an Asteroid Belt for starters, just around the moon we just made? Save up your work by going through the File menu and we�ll continue.
|
|
|
|
|
Copyright © 2002 Strategy First Inc. All Rights Reserved.
|
