


 Forums Forums
StrategyFirst.com

|
 |
Strategy Guide |
|
O.R.B. Campaign 1-5 Strategy Guide
This strategy guide covers the first five chapters of the Malus and Alyssian campaigns.
 |
|
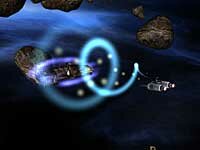
The Rise of the Night Sky
Malus Chapter One |
 This is a simple tutorial map, to introduce you to storyline. This is a simple tutorial map, to introduce you to storyline.
Initially you start with 5 fighters, set them to aggressive to be sure that you�ll get the first shot should you encounter enemies.
When you encounter the Seekers for objective 2, notice that reinforcements will arrive from the top right quadrant.
Once the container starts moving towards you in objective 3, quickly approach it because it will be attacked once it enters the playable area. You want to draw fire away from it, because containers are slow-moving and vulnerable.
In objective 5, don�t attack the carrier until all the Fencers are gone. You�ll be wasting your time. Once the Fencers are gone, though, watch out because the carrier will spit out a few reinforcements intermittently until you disable it.
|
|
Heretics Within
Malus Chapter Two |
 The second map finds you striking against the Seekers. The second map finds you striking against the Seekers.
You�ll want to quickly take the resource asteroid that you start next to, and there is another one a bit further out towards the center of the map. Empty the mines quickly by moving your carrier next to them and building a few freighters.
Start by researching academics to increase your manpower.
Build some Duelists to defend your bases, and send some towards the center of the map, where the meaning of the divine path will be revealed to you.
This mission is fairly simple as long as you stay out of the enemy�s way at the beginning.
|
|
Tomb of the Gods
Malus Chapter Three |
 This mission throws you right into a skirmish with the Seekers. Immediately send your fighters to the aid of the Divinity I squadron, but you should probably powerdown your recon vessel to prevent it from being detected by the enemy. This mission throws you right into a skirmish with the Seekers. Immediately send your fighters to the aid of the Divinity I squadron, but you should probably powerdown your recon vessel to prevent it from being detected by the enemy.
Once you�ve destroyed the enemy squadron, send your recon vessel to investigate each piece of debris. Since you can�t auto scan debris, you�ll have to send your recon vessel to each piece of debris individually.
Tip: Look on the 3D map at each of the debris pieces. Go for the biggest one.
Have your fighters escort the recon vessel, because when you�ve scanned the proper piece of debris, the Seekers will swoop in with another round from the far left side of the map.
After the recon vessel has done its job, send it back to the portal to keep it out of harm�s way.
Your best strategy once the Seeker squadron has arrived is to send 2 or 3 Fencers after the recon vessel (make sure you select �attack to disable� from the action menu) and have the rest of your fighters concentrate the attack on the Interceptors.
Tip: Make all your ships fly to the portal, except for a couple of fighters before the enemy fleet arrives. Lure the fleet to the portal, and �attack to disable� all of them. If it is well timed, you can capture the ships in the next objective, when you receive a troop transport.
When you receive the troop transport, send it to the disabled Seeker recon vessel. You�ll find out that before the crew could be subdued they sent out a distress signal. Be prepared for more fighters, including hybrid Interceptors, which need to be taken out quick. They will be coming in from the bottom left side of the map, then the center left. Send your fighters towards the relic to protect it.
Take out one squad at a time. The hybrid Duelists appear last. They have a strong beam, but can�t take very much damage. It is best to split up your forces at this point.
|
|
First Contact
Malus Chapter Four |
 This map is basically an AI map that finds you expanding to destroy the Seekers in the Observer Sector. This map is basically an AI map that finds you expanding to destroy the Seekers in the Observer Sector.
The key to keeping the AI in check is to cripple its resource expansion. So take over as many resource asteroids as you can, and take out any recon vessels you encounter.
There is one resource asteroid right next to the spaceport, above it, and another quite near, about one quarter of the way out from the right side of the map, on the same parallel as the first asteroid. There�s another asteroid in the very middle of the map, and that�s a good one to take but be prepared to defend it.
There�s a hybrid destroyer nearby waiting to take out any ships that venture further into the Seekers territory, so make sure your ships stay on your side of the border!
Remember that this is a persistent fleet map, so before you take out the AI for good, you�ll want to build as many ships as possible to take over to the next map.
Tip: Build at least a couple of repair ships and resource bases to take over to the next map. You�ll need them.
|
|
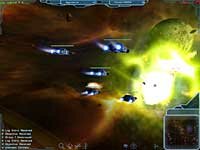
The Divine Path
Malus Chapter Five |
 The Divine Path is a difficult map. You�ll need to start quickly, and stealthily. The Divine Path is a difficult map. You�ll need to start quickly, and stealthily.
All your ships start off some distance from the spaceport. Since time is of the essence, immediately send some Fencers, some Duelists, then some Interceptors, and finally all your repair ships, in a beeline for Numinous X. You�ll encounter some resistance on the way, but they should be easily dispatched by your fleet.
If you can, while all this is going on, send out a couple of recon vessels. You�ll need to set up a mine quickly, because you�ll resources and fast. There is a resource asteroid north of the spaceport and another to the left of the spaceport, one third of the way out.
Once you�ve killed all the light resistance between your spaceport and Numinous X, dock your entire fleet, including the repair ships and Numinous X. There are 2 destroyers with some Interceptors coming your way, and you don�t want to attract their attention until you have a destroyer of your own. Another option is build a troop transport and attempt to capture the destroyers with a fleet of Interceptor:M�s and Marksmen.
If you�ve docked Numinous X, it is likely that at least one of the destroyers will retreat. You�ll have to wait until the grey dots move out of range to be sure. Remember that engaging one of them will trigger the other to attack.
Be prepared; mine as much as you can. The AI won�t go for your freighters if it is distracted by the fighters!
Build destroyers as soon as you can, since a carrier will be heading your way.
Once you�ve killed the carrier, the worst is over. The AI doesn�t have any other heavy artillery to send against you, so expand aggressively to prevent it from building.
Mines are easily taken out by Marksmen T.
The enemy�s base is at the top left corner, close to the gate.
Kill all AI structures to win the map.
 |
|
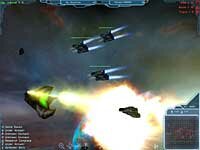
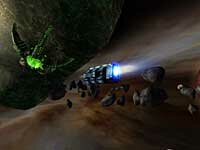
Exodus
Alyssian Chapter One |
 Start off by sending your ships to the ping. This will trigger the alien ships. They do massive amounts of damage, but are easily taken out. Take them one at a time and there shouldn�t be any problems. Start off by sending your ships to the ping. This will trigger the alien ships. They do massive amounts of damage, but are easily taken out. Take them one at a time and there shouldn�t be any problems.
Once your first objective is completed, you�ll need to go after another ping, but this time you�ll have backup.
You�ll have a lot more ships to deal with, so it is best to split your forces in groups of 5 to take out a few aliens at a time.
The last aliens you�ll have to deal with are the bipods, but they aren�t much tougher than the pods, so it is nothing to worry about.
|
|
Storm Watch
Alyssian Chapter Two |
 Build a resource base right off the bat and send it over to your newly discovered resource asteroid. Build a resource base right off the bat and send it over to your newly discovered resource asteroid.
When the base is built 3 alien squads will appear. Take out the ones closest to your cargo ship first; you can take out the others as they come.
You�ll probably want to micromanage your fighters when they�re attacking alien pods, especially in swarms. They�re very tricky...
There�s another resource asteroid right under your base. The aliens are not a threat to your bases, as their weapons are ineffective against large objects.
Light fighters are best against the alien fighters, while it is easiest to take out the asteroid pods with medium fighters.
The main objective of the map, to destroy all alien opposition, can be triggered early by forcing the aliens to come to you. This may or may not be effective, depending on your fleet at the time. Once you destroy the enemy�s gate, all of their fighters will drop what they are doing and begin to attack you. You can take out the portal fairly easily by bypassing and avoiding the fighters and rushing the bottom of the map. It only takes a few hits to destroy the gate, and then you can concentrate on taking out the fighters without worrying about any more appearing. The longer you wait, the more reinforcements the aliens will receive.
|
|
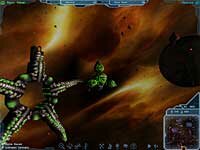
A Cure for the Plague
Alyssian Chapter Three |
 The Dai sector is crawling with aliens, so you�ll have to be cautious when sending out unarmed ships on their own. However, it is important to scout out where the alien asteroid pods are. The Dai sector is crawling with aliens, so you�ll have to be cautious when sending out unarmed ships on their own. However, it is important to scout out where the alien asteroid pods are.
There are 4 mines on the map, so you can use your recon vessels to spot them and they do a good job of drawing the fighters away from your main bases.
In this map, you�ll be able to research cloaking, and a judicious use can be made of it, to sneak attack alien pods. However, there isn�t only the standard fighter pod to be afraid of on this map. This will be your first encounter with the Ktu-Pod, a massive alien destroyer. Marksmen are excellent against it. Expect to run into it two thirds of the way into the map.
Destroy all the asteroid pods and then follow further instructions to complete the map.
|
|
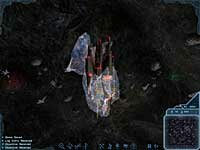
The Path of the Gods
Alyssian Chapter Four |
 In Path of the Gods, the first thing you need is stealth, and lots of it. In Path of the Gods, the first thing you need is stealth, and lots of it.
The key to surviving this map is avoiding the enemy, not attracting it.
Powerdown is your best friend, and you will need to know how to use the 3D map.
By flying high above or below your enemy and powering down, you will be able to avoid fighters coming your way.
Your first task is to investigate the Aldar base. Send your ships towards it, but be prepared for a light Kyulek attack.
It is alright to destroy the aliens that are attacking you, but remember you don�t want to attract any more attention than necessary.
From this map onwards, it is persistent fleet. It is very advantageous to sustain as little damage as possible to carry forward all your ships.
When you�ve scanned the artifact, your most valuable ship for this mission will appear: the Aldar fighter. It is fast, it hyper jumps and cloaks, and its firepower is awesome. Hyper jumping and cloaking comes in handy when you�re in a tough spot.
Before making a move towards the gate, it is probably best if you send out a scout to scan for asteroid pods. It is essential to avoid the pods, as they will spit out fighters if you come too close. The closest pod is on a small asteroid on the left center side of the map.
Plot a path to avoid the pods, and be careful, stealthy and patient. Make your ships travel high and they�ll be detected less easily, since the aliens tend to fly near the center or low. Also, keep your ships together.
You�ll probably be traveling in a Z pattern starting right to left. At each bend, there�s a Ktu-Pod patrolling, with tri-pods. Try and avoid it, and if it detects you, remember that it is easily destroyed with the Aldar fighter, or you could outrun it; it is just not very fast.
The last bend is the trickiest, and there is a high chance that you�ll be detected. If it is the Ktu-Pod, just run to the goal from there, it probably won�t be able to keep up.
Lastly, at the very end of the map a set of ships are guarding the portal. The easiest way to deal with this is to use your lone Aldar fighter and his abilities while the other a well hidden.
A few tips on squad build up:
Making a set of small groups can prove more efficient when maneuvering around the enemy forces then in one big chunk.
If you wish to have a quick and efficient scouting team you can group the Aldar fighter with 5 justice fighters or the hybrid interceptors to move around fast and have acceptable fire power.
Using the recon vessel can prove useful when trying to find the location of enemy vessels since it has a larger radar range then most ships on this map. Making a group with this vessel and a suitably powerful force can be a great help in this map.
The two cargo ships should be in the same group since they are the slowest units your have. Whether you wish to give them a team of fighters or not depends on the importance you give them. But know that having them in the next scenario can be of GREAT help. Those cargo ships along with the recon vessel are the most useful units you could bring over to the next map.
Take a good look at those hybrid ships you also gained, the hybrid interceptors have good speed but there weaponry is rather weak. The hybrid duelist on the other hand packs a punch.
Knowing the paths your enemies take, their radar ranges and learning to identify ships in passive range by movement speed is the best way to get trough this map easily, but this can only be done with a great amount of patience.
|
|
Gathering of the Paths
Alyssian Chapter Five |
 Building destroyers quickly and efficiently is the key to this map. Building destroyers quickly and efficiently is the key to this map.
Though you do not know it from the beginning, the Malus are in the sector, and overpower you by far in this map.
It isn�t to your advantage to complete the first objective assigned to you immediately: If the Malus follow you to your base, it will be over. So once again, stealth is important. Avoid having them detect you.
When the Malus appear, take them out, but protect the Aldar fighter. It is particularly vulnerable to the missiles.
If you wish to gain the location of the resource asteroids real quick, here�s a tip:
Save up your game right at the start of this scenario, before doing any thing, then make sure all your SUs are placed in man power, retire most of the ships you brought over from the last mission except your recon vessel and build a fleet of recon vessels.
Give ALL recon vessels the auto-scan order. In no time you should have a great part of the map scanned, know where the resources are and have a good an idea of where the enemies are.
Then reload your map, send out your recon vessel to the resource asteroids and build only 2 resource bases. Send out those resource bases to the asteroids, send your cargo ships to the nearest mine, retire all the smaller fighters you still have. Make sure both cargo ships you gain after building the mines are used on the nearest mine you have. This way you will get the resources as fast as possible.
Once your harvesting line is set up, transfer all your SUs to research in your SU management window. Then start researching what you need to get the space Dock and the Righteous.
Once you have the space dock researched, you can send your recon vessel to scan the resource asteroid found near one of the Aldar gate, the one where the Malus are not present.
If you decide to start building the space dock or another resource base remember to switch all your SUs to manpower.
While you get your research and harvesting done, keep an eye on any Malus ships. If you see a grey dot coming near you, try to move away from it or lure it away from your spaceport. Keep the bulk of your force unknown for as long as possible. This will give you time to build up three Righteous.
Once you get three Righteous you can start hunting for the Malus. Try to keep a small squad of fighters; they can prove very useful when finding enemies that are running away from you.
Once you get the armed carrier out of the way, it should become easy picking.
With careful managing of your resources you should be able to get up to 6 Destroyers ready for the next battle.
Another way to go is get a Troop Transport and capturing the Malus Carrier. That might be a bit more challenging.
Keep your fleet in good shape, and you�ll be ready for the next map.
|
|
|
|
|
Copyright © 2002 Strategy First Inc. All Rights Reserved.
|
