


 Forums Forums
StrategyFirst.com

|
 |
O.R.B. Environment Tutorial |
|
|
Creating a Star Field and Nebula Effects
In the top menu, go back to Environment > Starfield.
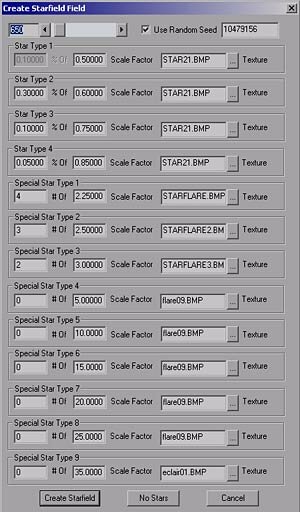 |
The Create Starfield window should now appear, you shouldn�t need to change any thing here apart from the total amount of stars in the field, the 650 number at the top.
Each star has an amount field, a size field and image file field. The default size for each star are enough for this test map, but feel free to explore if you wish.
The one thing that you should watch for is the total amount of stars, it shouldn�t go above 600. Otherwise it becomes very resource heavy for the computer. Keeping it low will prevent any problem. 600 is already enough in truth, since it�s 3 �layers� of 600 stars or 1800 in other words.
Now make sure the amount of stars is 600 in the field beside the scroll bar at the top.
Click on Create Starfield.
|
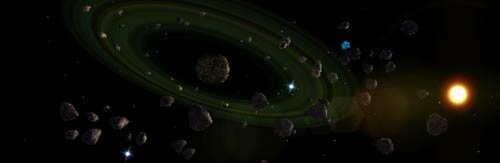
Alright, we got some stars; now let�s add some nebula effects to the background.
First go to Environment > Fog.
 |
A small window like this one on the right should appear.
The options in this window should be left as is; they will be explained in detail in a future tutorial for these features.
In the mean time, you should at least know that orientation adjusts the angle position of the fog sphere. The nebula effect is like a giant sphere with the player�s camera inside, changing these values would rotate the fog image.
|
There already is a nebula image by default, but we are going to use another one. Click on the Properties button in the window.
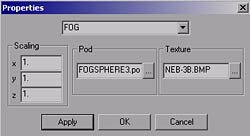 |
By default, you should see �FOGSPHERE5.pod� in the Pod section of this window. Try changing file name to �FOGSPHERE3.pod�, leave the scaling as it is right now.
You do not need to update the texture file name in the Texture section. It will be updated as soon as you press Apply. When you have changed the Pod name, go ahead and press Apply.
|
Back in the fog window you can now simply press Create Fog.
You probably have something like this. A bit loud and bright, it doesn�t seem to work well with the lighting of the asteroids. You can change this quite drastically with the material window.
Go into Environment > Material and then find Fog in the drop down list.
This is the �middle ring� of the fog sphere; there is also a �top� and �bottom�.
In Fog enter these values for emissive:
0.39
0.60
0.56
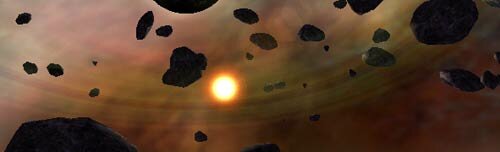
Press Apply, the color of the fog should now be darker and green.
Then go to Fog Top, enter these values in emissive:
0.26
0.40
0.39
Press Apply again and then press OK.
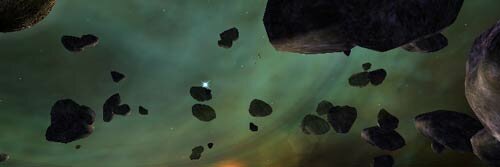
The overall look now seems softer and more moody. There isn�t much more we can add, unless you want to drop a few ships for players on the map.
|
|
|
|
|
Copyright © 2002 Strategy First Inc. All Rights Reserved.
|
